If you’re like most WordPress site owners and implementers, security and performance are two topics that are dear to your heart.
So if I told you that there was one service that can both secure your site and make it load faster, you’d probably be pretty interested, right?
That’s what Cloudflare can do. And Cloudflare is what I’m going to talk about in this post.
I’ll tell you what it does, how it helps your site, and, most importantly, how to set up Cloudflare for WordPress the right way.
What Is Cloudflare And How Does It Help Your Site?
Cloudflare is a DNS, security, and content delivery network (CDN) service that speeds up and secures your website.
When you set your website up with Cloudflare, you’re essentially routing all your traffic through Cloudflare’s global network. This leads to a number of benefits like:
- Faster page load times – because Cloudflare caches your content across its network, you get all the speed benefits of a content delivery network.
- Decreased bandwidth usage – again – because Cloudflare caches your content on its own network, you’ll use less bandwidth to serve up your website.
- Clean traffic – Cloudflare filters out bot traffic and other negative traffic sources.
- Enhanced security – Cloudflare offers a web application firewall, DDoS protection, and free SSL to secure your website, though not all of these features are available in its free plan.
In addition to its security benefits, Cloudflare claims that, on average, it’s able to reduce bandwidth usage by 60% and cut page load times by 50%.
How Cloudflare Uses DNS To Power Its Service
At a high level, Cloudflare works by controlling your website’s DNS, short for domain name system.
DNS is basically the system that connects your domain name with the actual IP address of your web server. People call it the “phone book of the Internet.”
You type a human-readable URL into your browser toolbar and then DNS is what translates and routes that human-readable text into a machine-readable IP address.
To route that traffic, DNS uses something called nameservers, which are essentially a collection of records. These individual record types are:
- A – contains the IP address(es) for your domain and subdomains
- MX – specifies where email should be delivered for your domain
- CNAME – lets you set up redirects from one subdomain to another domain/subdomain
- TXT – lets you store additional information, like SPF for email verification
Cloudflare works by inserting itself into this process as the nameservers for your domain.
Essentially, this lets Cloudflare handle routing your traffic, which means that when a visitor tries to access your site, Cloudflare is able to:
- Scan incoming traffic to see if it’s a threat (for better security)
- Route that traffic to the closest data center in Cloudflare’s global network (for content delivery and improved page load times)
Note – If you’d prefer, you can also just use Cloudflare as a standalone DNS service and eschew the security and CDN elements.
How To Add Cloudflare To Your WordPress Website In 5 Minutes
The basic process for setting up your website with Cloudflare is surprisingly easy and doesn’t require any software or hardware, which is one of the major benefits of Cloudflare
Here it is in a nutshell:
- Sign up at Cloudflare
- Add your site and let Cloudflare scan its DNS records
- Confirm and clean up DNS records (if needed)
- Change your domain to Cloudflare’s nameservers
Let’s run through each step in a little more detail…
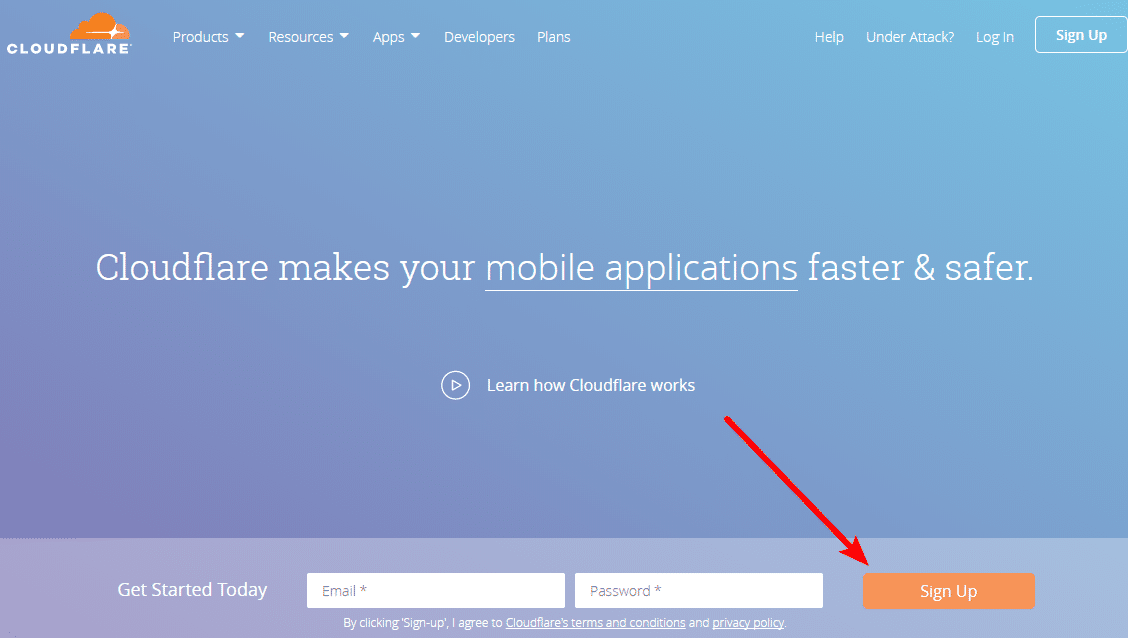
Step 1: Create Your Cloudflare Account
To get started, head on over to Cloudflare and create a new account:
Step 2: Add Your Website To Cloudflare
Once you’ve created an account, Cloudflare will prompt you to Add a website right away. To do that, just paste your domain name into the box and click Scan DNS Records:
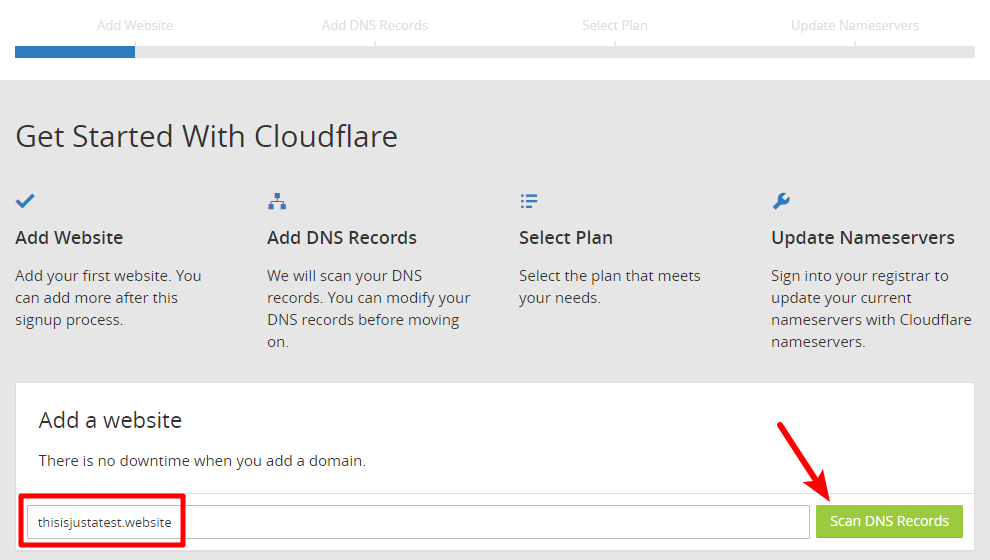
Now, you get to watch a short explainer video while Cloudflare scans your site’s DNS records. Once the process finishes, click Continue.
Step 3: Confirm DNS Records And Modify If Needed
On the next page, you can choose which DNS records will be routed through Cloudflare and which will bypass Cloudflare’s network.
You don’t necessarily need to do anything in this interface.
In fact, the only thing that you absolutely need to verify is that you see the orange icon next to the record for your actual domain name:
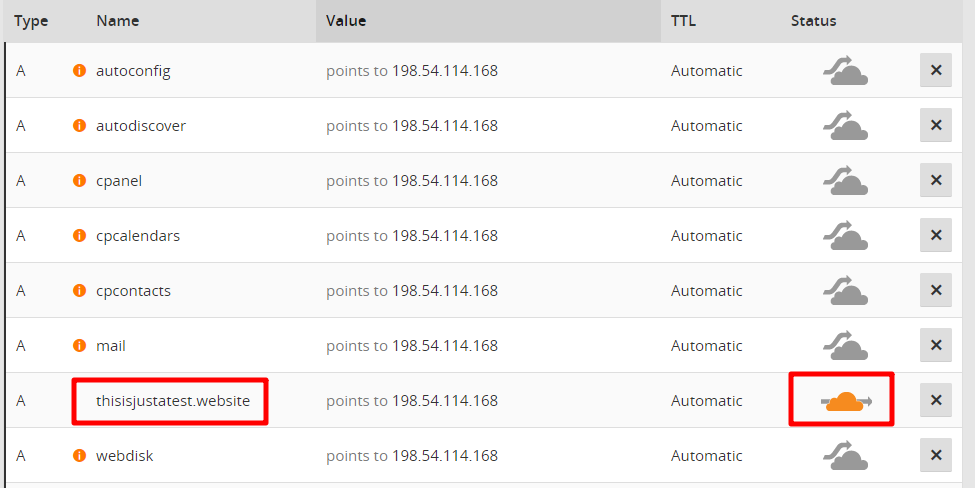
If you’re a beginner, you can usually stop right now. But depending on your website’s setup, you might also want to verify that:
- You see the MX records for your email (if applicable). Cloudflare does not route MX records through its network.
- Any subdomains that you use are either included or excluded from Cloudflare (according to your desired configuration).
Once you’ve configured everything, click the Continue button.
Step 4: Choose Your Plan
On the next page, Cloudflare will try to upsell you to its paid plans. For now, you can just go ahead and choose the Free Website option:
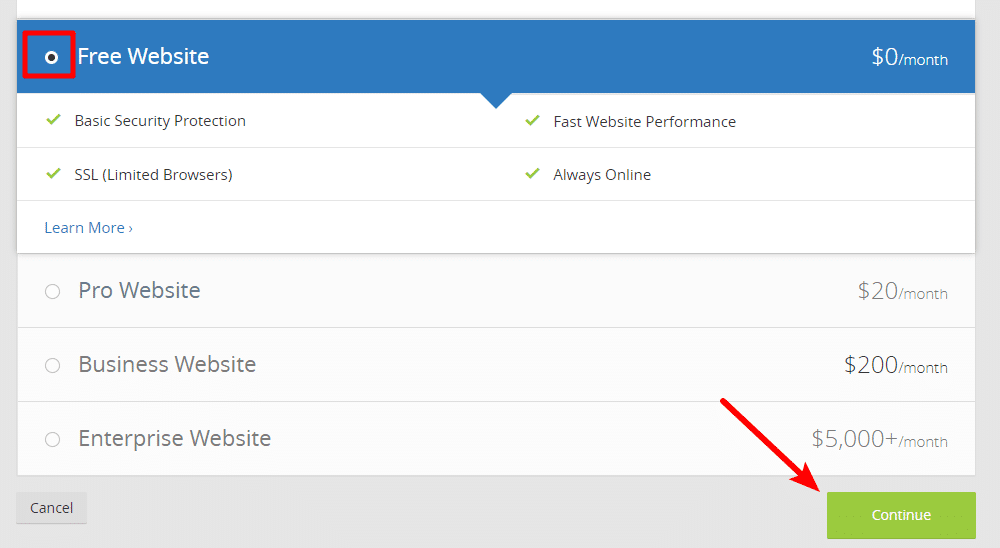
I’ll discuss some of the reasons to upgrade to Pro later on.
Step 5: Change Nameservers to Cloudflare
At this point, you’re ready to switch your nameservers over to Cloudflare. Head to wherever you registered your domain name and update the nameservers to the two values provided by Cloudflare:
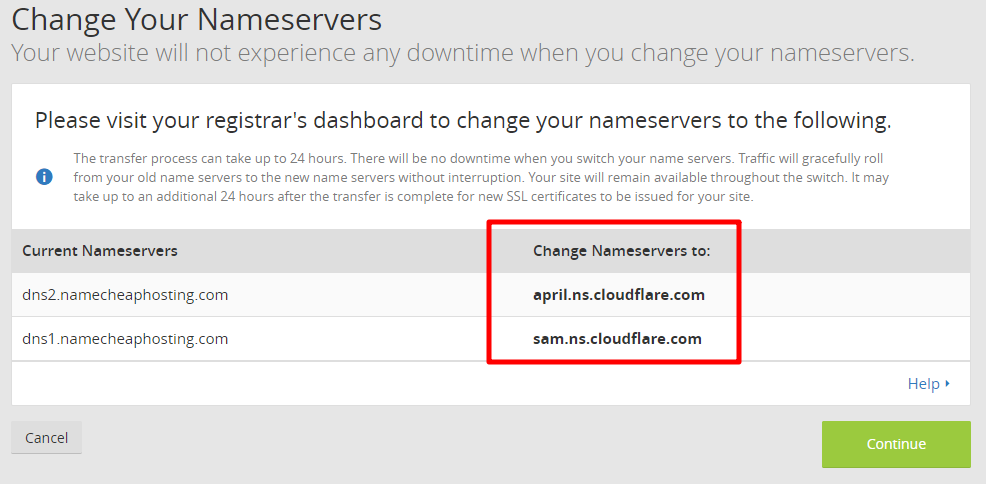
If you’re not sure how to do this – I recommend that you consult your domain name registrar’s support documentation, as the process is different for each registrar.
Here’s what it looks like with Namecheap:

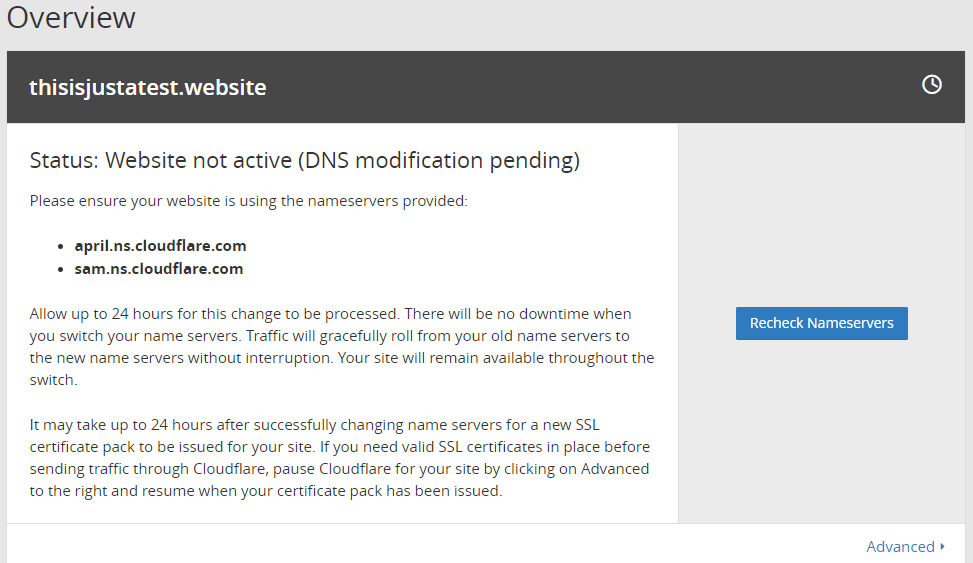
Once you make the changes at your registrar, head back to Cloudflare and click the Continue button to finish the process.
You may need to wait several hours while your new nameservers propagate:
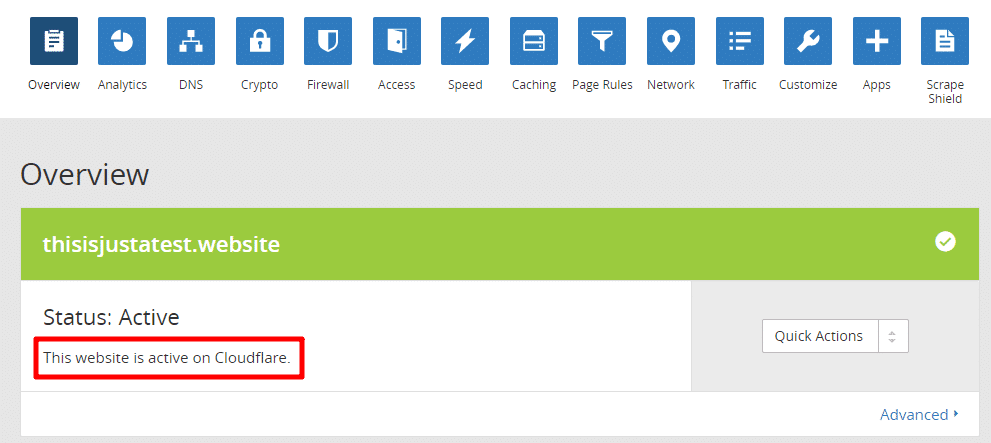
But once your nameservers have propagated, you should see the full Cloudflare dashboard:
How To Integrate Cloudflare With WordPress
If you’re using WordPress, Cloudflare provides a dedicated plugin that:
- Lets you configure WordPress-optimized settings with one click
- Adds WordPress-specific rulesets to the web application firewall (for paid plans)
- Lets you automatically purge Cloudflare’s cache when you update your content
And the plugin also lets you change Cloudflare settings from inside your WordPress dashboard, rather than needing to use the Cloudflare website.
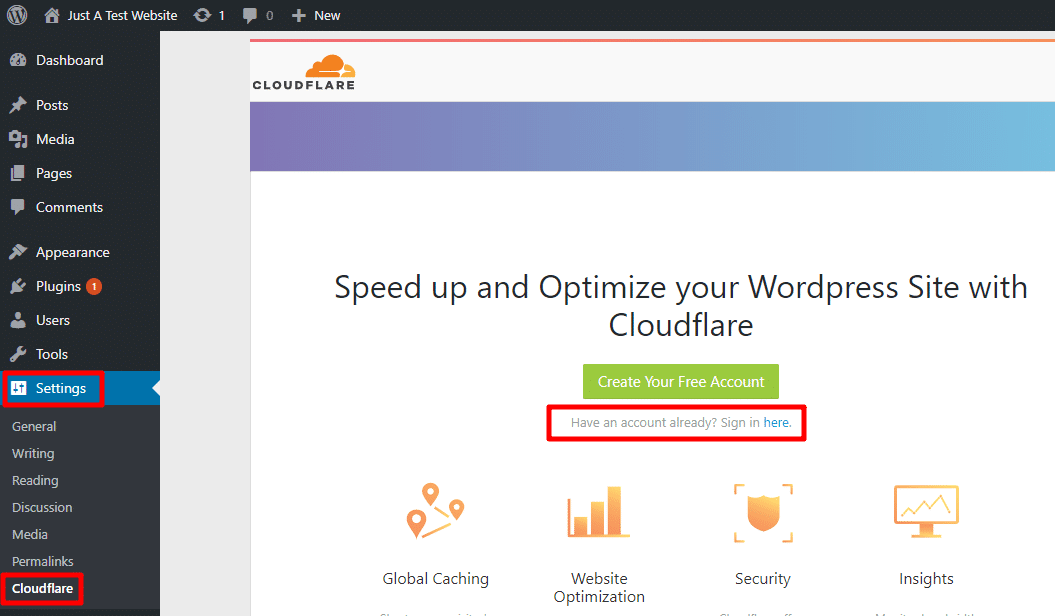
Step 1: Activate Official WordPress Plugin
To set up the plugin, get started by installing and activating the Cloudflare plugin. Then, go to Settings → Cloudflare in your WordPress dashboard and click the link to sign in:
On the next screen, you’ll need to enter your email address and API key:
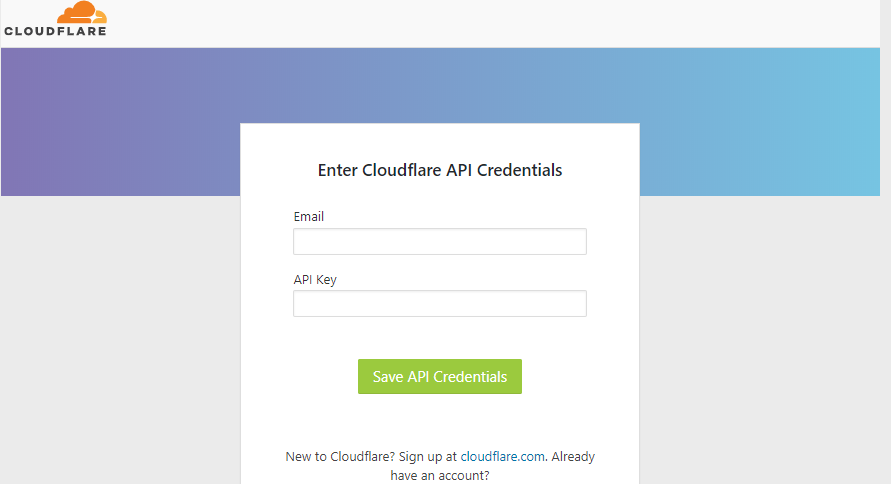
To find your Cloudflare API key:
- Go to the Cloudflare interface
- Click on your email address in the top-right corner
- Select My Profile
- Scroll to the API Key section
- Click View API Key next to the Global API Key option

Copy that value and paste it into the API Key box in your WordPress dashboard:

Step 2: Enable Optimized WordPress Settings
Once you activate your Cloudflare account within the plugin, you’ll see a number of new options in the Cloudflare plugin interface.
One nice thing about the plugin is that it includes an option to Optimize Cloudflare for WordPress. When applied, Cloudflare will make a number of tweaks to your settings to, well…optimize your settings for WordPress. You can view a full list of those changes here.
While you’ll need to further customize things still, applying these settings is a good way to get started:

If you’re using a caching plugin like WP Rocket, you should also consult the developer’s documentation for potential specific integration settings. For example, WP Rocket will automatically configure things for you if you authenticate your Cloudflare account with the WP Rocket plugin.
3 More Advanced Cloudflare Configuration Options You Should Set Up
While the basic Cloudflare setup process is fairly simple, if you want to optimize your site, you’ll need to configure some additional settings in your Cloudflare dashboard, especially if you’re using WordPress.
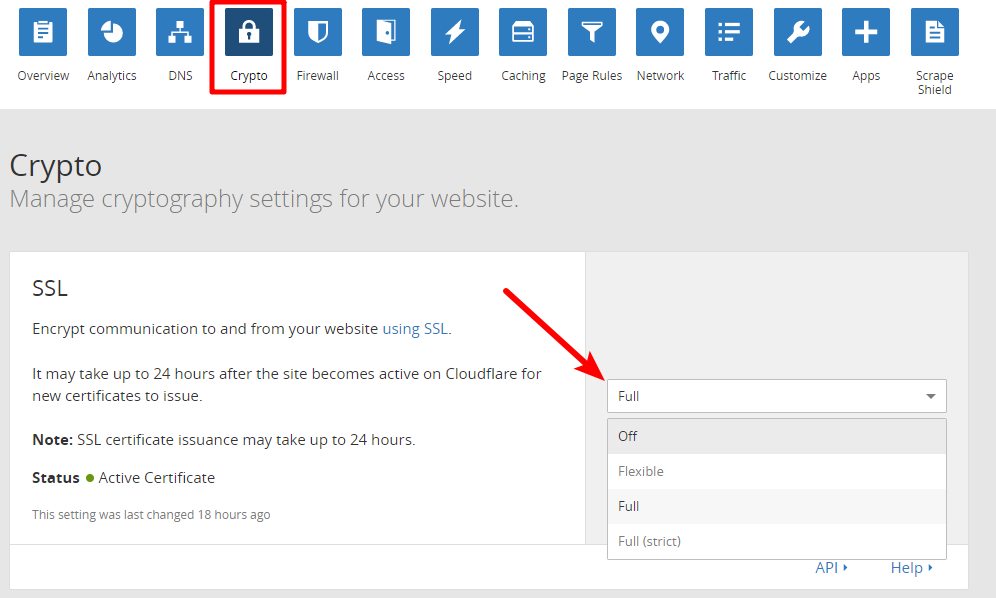
Step 1: Configure Cloudflare SSL Settings
Cloudflare gives you multiple options for how you configure your SSL connection:
- Off – no SSL active. This isn’t recommended
- Flexible – traffic is secure between your visitor and Cloudflare, but not between Cloudflare and your origin server.
- Full – secure connection between both your visitor and Cloudflare and Cloudflare and your origin server
- Full (strict) – the same as Full but with the benefit of authentication
Here’s which option to use:
- If you’re able to install an SSL/TLS certificate at your host, use one of the Full options (depending on the type of certificate you have).
- If you’re unable to install an SSL/TLS certificate at your host, use the Flexible option. It still adds some security and gets you the coveted “green padlock”.
To configure your SSL settings, go to the Crypto tab in your Cloudflare dashboard and use the drop-down:
Step 2: Set Up HTTPS And WordPress-Specific Page Rules
Page rules are a helpful feature that let you:
- Exclude specific URLs from Cloudflare
- Force HTTPS on all your pages/content
By default, Cloudflare gives you 3 free page rules, though you can add additional page rules starting at $5 per month for 5 rules.
For most WordPress sites, though, 3 page rules are enough to get started. Here’s what you’ll want to use them for:
- Force HTTPS
- Exclude wp-admin from Cloudflare and secure
- Secure wp-login.php
The latter two rules are important to secure sensitive areas of your site and ensure that you don’t experience any issues with the WordPress dashboard.
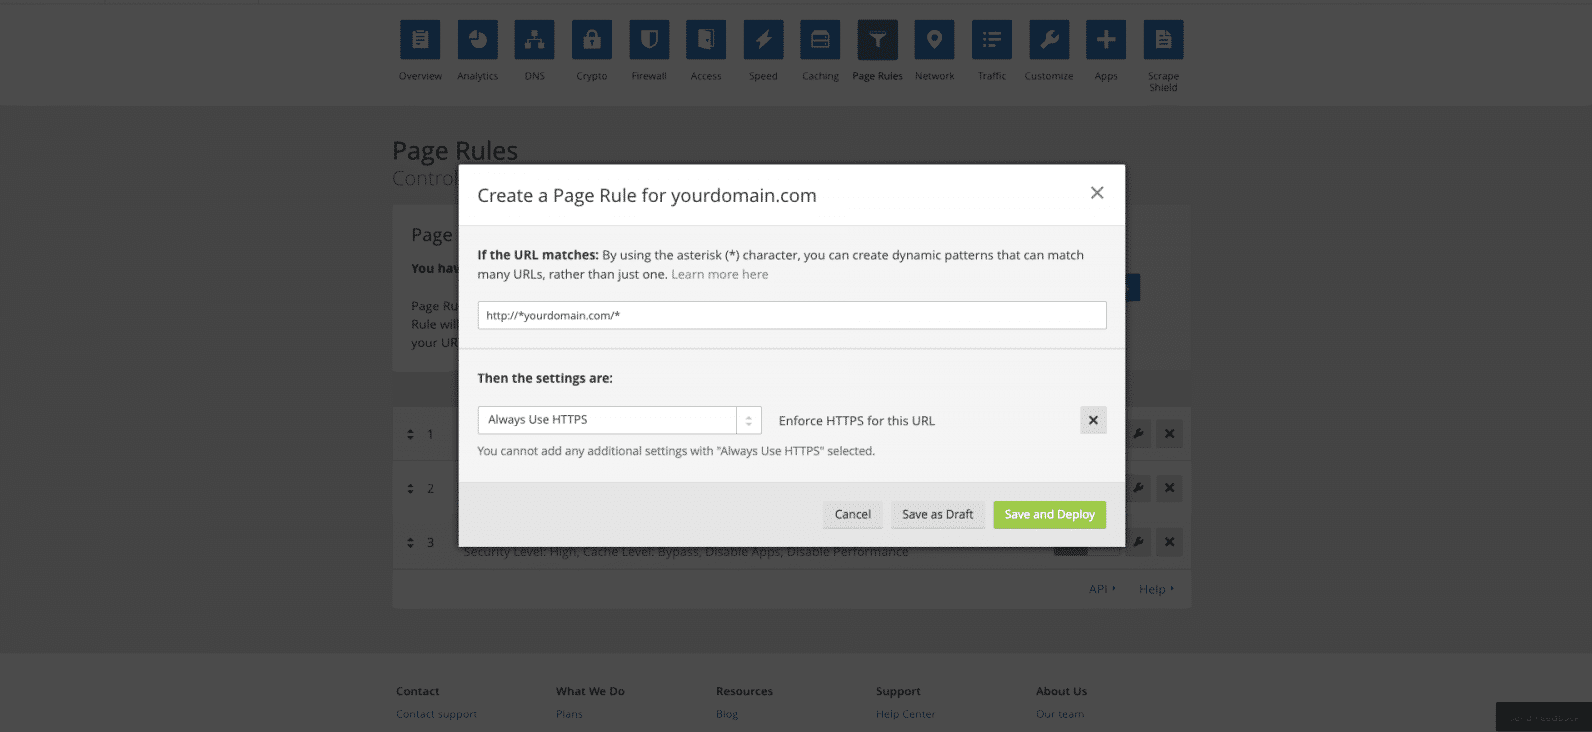
To set up your page rules, go to the Page Rules tab in your Cloudflare dashboard. Then, click Create Page Rule:

Page Rule #1: Force HTTPS
To force site-wide HTTPS use, create a page rule for http://*yourdomain.com/* like follows:
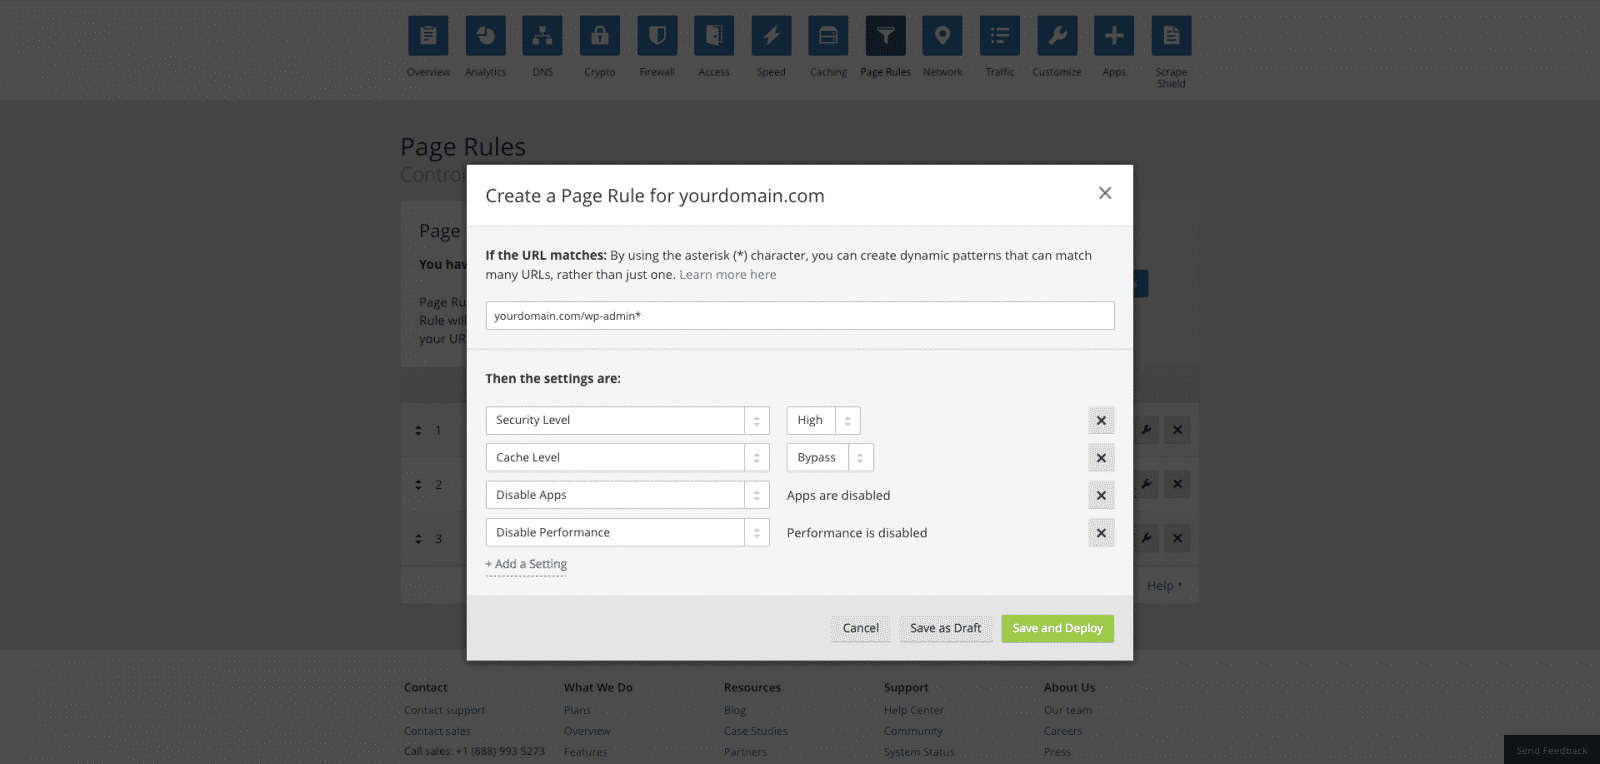
Page Rule #2: Secure wp-admin And Exclude From Cache
Next, create a rule for yourdomain.com/wp-admin* like follows:
Page Rule #3: Secure wp-login.php
Finally, create a third page rule for yourdomain.com/wp-login.php* like follows:

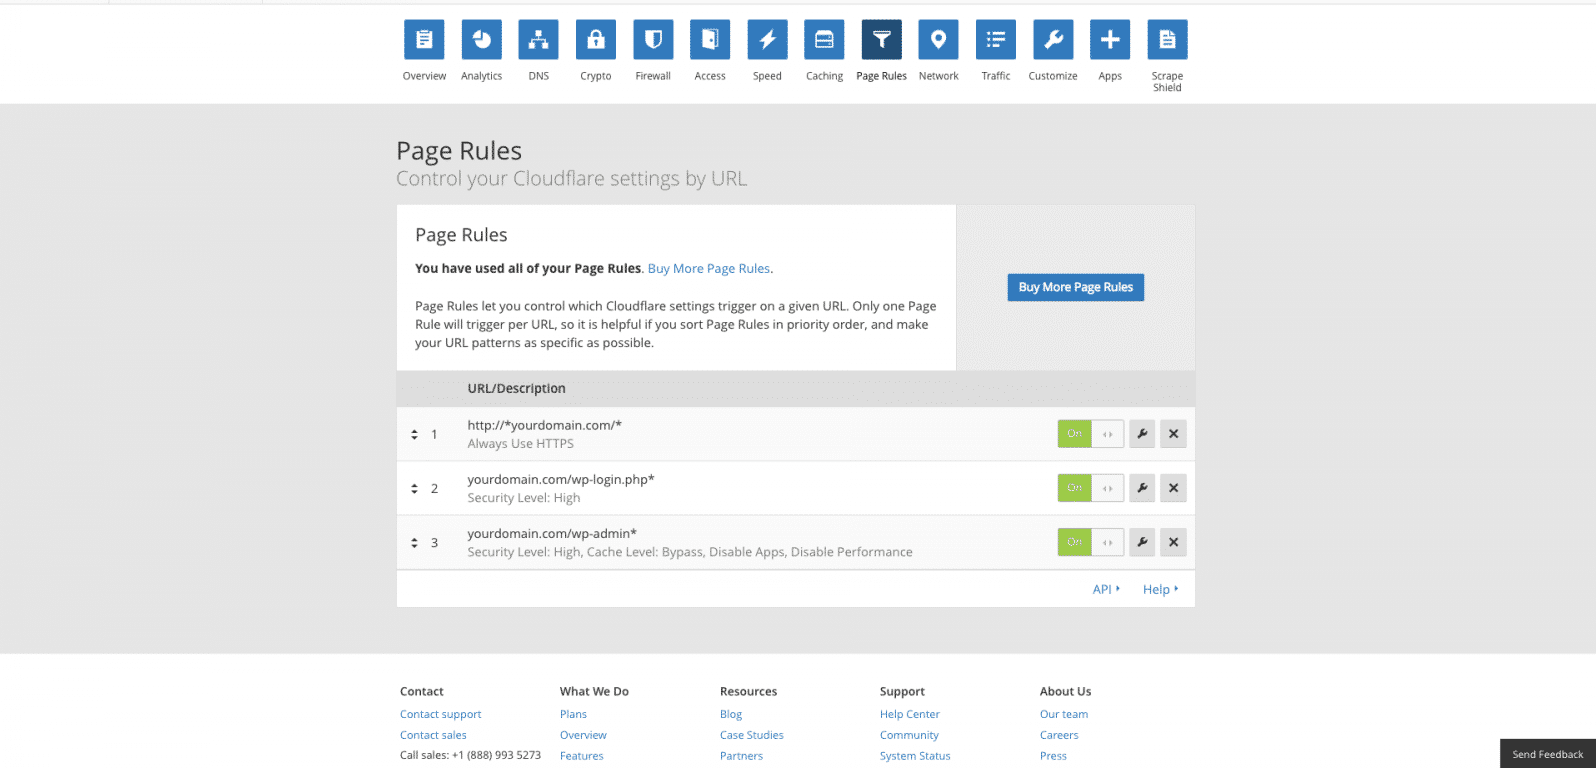
Here’s a quick recap:
Rule #1:
http://*yourdomain.com/*
Always use HTTPS
Rule #2:
yourdomain.com/wp-login.php*
Security Level: High
Rule #3:
yourdomain.com/wp-admin*
Security Level: High, Cache Level: Bypass, Disable Apps, Disable Performance
If you’re willing to purchase additional page rules (starting at $5 per month for 5 page rules), you can also do things like:
- Set specific cache settings for different URLs or directories (e.g. /wp-content)
- Manage 301 redirects for pages or for redirecting attempts at XMLRCP.php
- Lots of other smaller tweaks, like using browser integrity checks to block brute force attempts
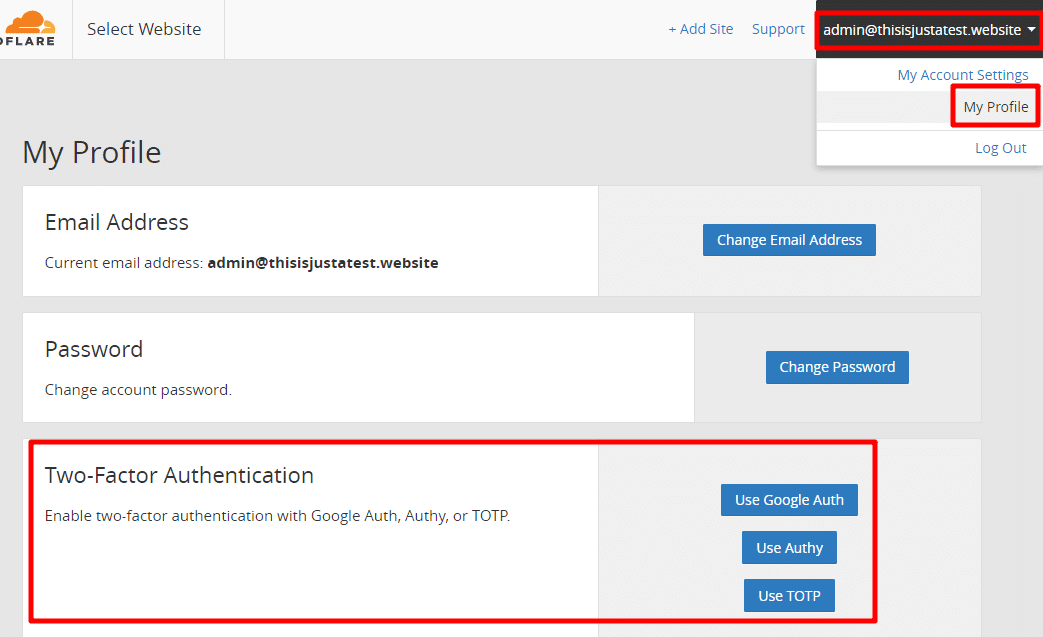
Step 3: Consider Using 2-Factor Authentication For Your Cloudflare Account
Because you can manage DNS records directly from your Cloudflare account (as well as a plethora of other sensitive settings), you need to pay serious attention to preventing unauthorized access to your Cloudflare account.
Thankfully, Cloudflare offers optional 2-factor authentication via:
- Google Auth
- Authy
- TOTP
To configure it, go to My Profile and select your desired option:
Other Helpful Features + Reasons To Consider Cloudflare Pro
Beyond the core features above, Cloudflare has a number of other features that you might want to consider:
- Always Online – FREE – if your site goes down, this feature serves up a cached version so visitors can still access it. Configure in Caching tab.
- Rate Limiting – Billed on usage (first 10,000 requests are free) – protect your site by blocking certain IP addresses that fit specified rules. Configure in Firewall.
- Argo – Billed on usage – delivers responses to users more quickly by using optimized routes across the Cloudflare network.
- I’m Under Attack Mode – FREE – helps protect your site during a DDoS attempt. Enable in your main dashboard.
- Web Application Firewall – PAID – includes specific rulesets for WordPress sites. Configure in Firewall.
- Polish – PAID – automatically optimizes images, including WebP images. Configure in Speed.
If you want access to features like the Web Application Firewall and Polish image optimization, Cloudflare’s paid plans start at $20 per month.
Final Thoughts On Cloudflare For WordPress Sites
Cloudflare offers an easy-to-implement way to both secure and speed up your WordPress website.
You can get started in just a few minutes by adding your site and pointing your nameservers to Cloudflare. After that, you’ll want to make some further tweaks by setting up SSL and page rules, as well as considering whether or not you want access to Cloudflare’s premium settings.
Give it a try and see if it improves your site’s page load times!